I keep getting messages from my antivirus that some of the apps are outdated, but keeping them updated is quite a burden, especially if I have many of them.
The solution, Choco + Windows' Task Scheduler.
What is Choco?
Choco, short for Chocolatey, is a package manager for Windows that allows you to easily install and manage software packages on your system. The "choco upgrade all" command allows you to upgrade all installed packages to their latest versions, which can be a time-saving process if you have many packages installed.
The steps to configure it
Sidenote: It only works for the applications installed with Choco
I have my OS configured in Spanish, but I'm sure you'll get it.
Step 1: Open the Task Scheduler
To open the Task Scheduler in Windows 11, simply type "Task Scheduler" in the Windows search bar and select the app from the results.
Step 2: Create a New Task
In the Task Scheduler, click on "Create Task" under the "Actions" panel on the right side of the window. This will open the "Create Task" dialog box. Provide a name for the task, such as "Choco Upgrade All".
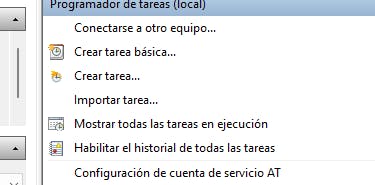
Step 3: Set the Triggers
In the "Triggers" tab, click on "New" to create a new trigger for the task. Select the appropriate settings for when you want the task to run. For example, you could set the task to run daily, weekly, or monthly.
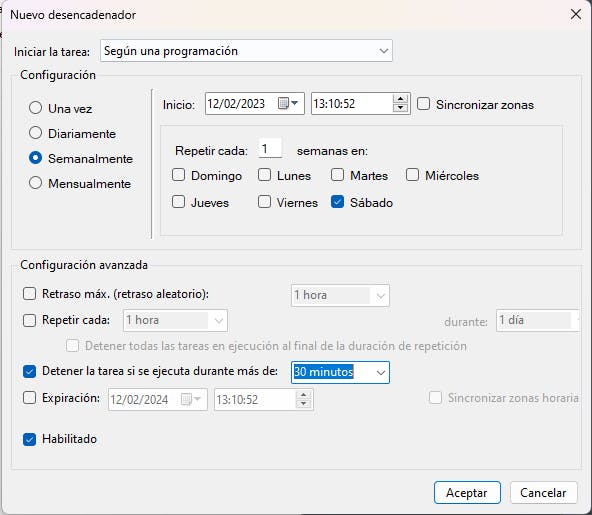
Step 4: Set the Actions
In the "Actions" tab, click on "New" to create a new action for the task. In the "Action" dropdown, select "Start a program". In the "Program/script" text box, enter the path to the "cmd.exe" file, which is typically "C:\Windows\System32\cmd.exe". In the "Add arguments (optional)" text box, enter the following command: "/c choco upgrade all".
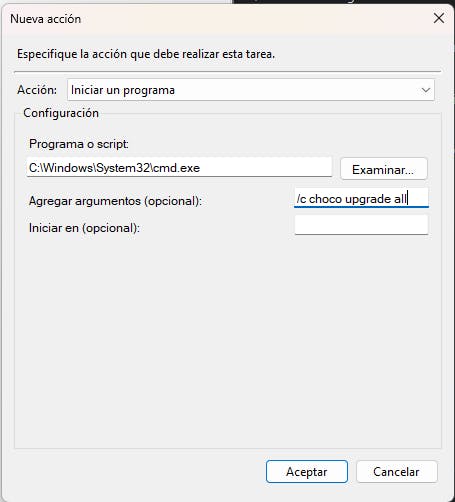
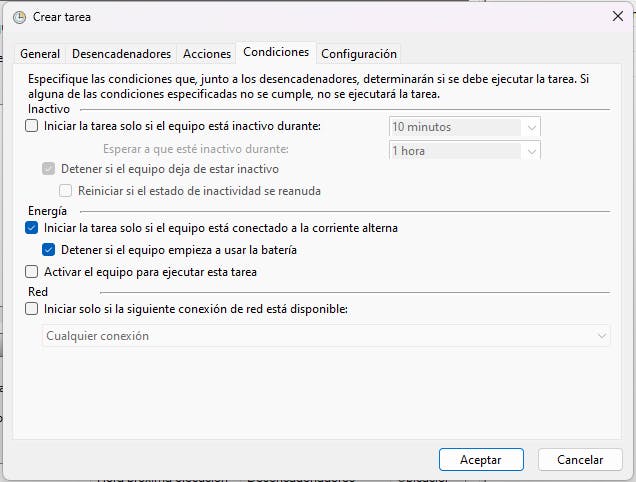
Step 5: Set the Conditions
In the "Conditions" tab, uncheck the "Stop the task if it runs longer than" option if it's checked.
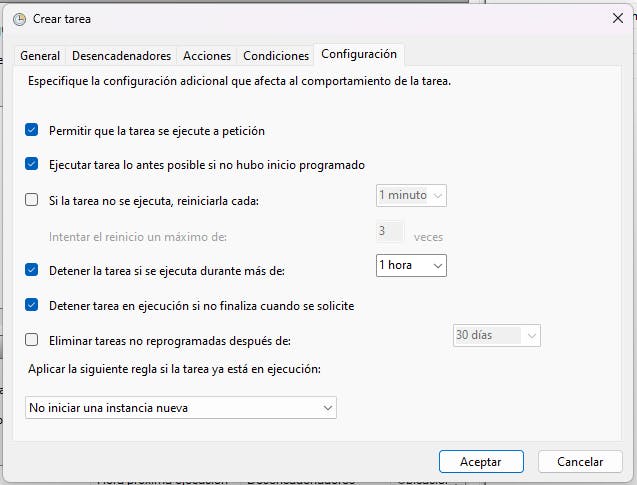
Step 6: Set the Settings
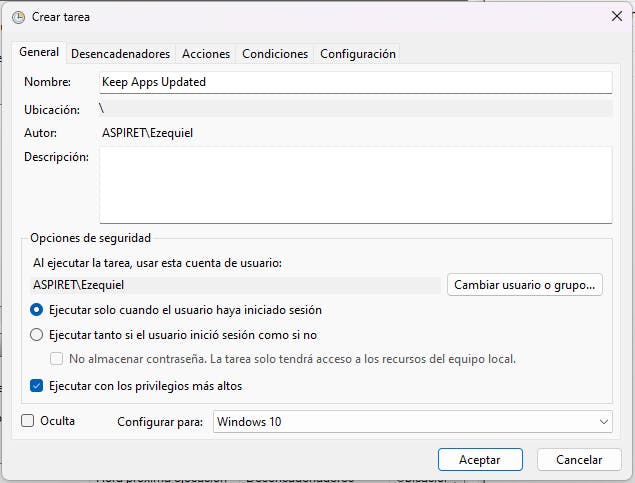
In the "Settings" tab, check the "Run with highest privileges" option. This will ensure that the task runs with elevated privileges, which is necessary for the "choco upgrade all" command to work properly.
Step 7: Save the Task
Finally, click "OK" to save the task and close the "Create Task" dialog box.
As always, I hope you can take anything useful from this and I'd like to know your thoughts.
